Node Package Manager
The Universal Parts Warehouse
Section titled “The Universal Parts Warehouse”Imagine you’re building that hotel (remember our giant construction site?). You could smelt your own steel, blow your own glass, and weave your own carpets. But that would be ridiculous. You’d never finish.
Instead, you order high-quality, pre-made components from a supplier.
NPM (Node Package Manager) is that supplier. It is the Universal Parts Warehouse for the JavaScript world. It sits at the very heart of the Node.js ecosystem, and without it, we’d all be stuck reinventing the wheel (or the button component) every single day.
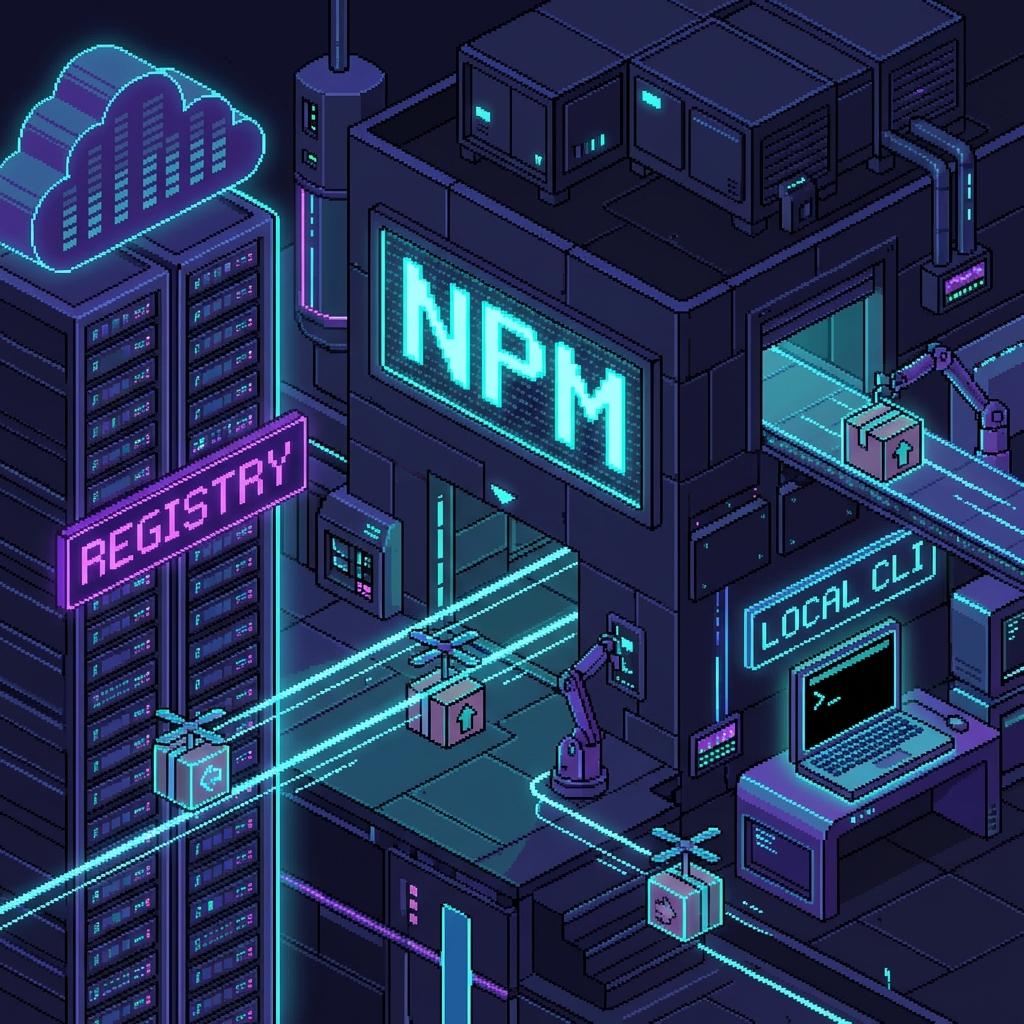 Fig 3.1: The Logistics Center. We order from the Registry (Cloud) via the CLI (Logistics Team).
The Two Faces of NPM
Section titled “The Two Faces of NPM”NPM is actually two things wrapped in one trench coat:
- The Registry (The Warehouse): A massive, cloud-based database containing over a million packages of open-source code. From tiny utility functions to massive frameworks like React or Express, it’s all sitting there, waiting for you.
- The CLI (The Logistics Team): The Command Line Interface tool installed on your computer. This is how you place orders, manage your inventory, and tell the warehouse exactly what you need.
(Note: NPM comes bundled with Node.js. If you have Node, you have NPM. You don’t need to install it separately.)
Packages: The Boxes
Section titled “Packages: The Boxes”A package is just a folder containing a program described by a package.json file. It’s a box of code. When we want to use someone else’s code, we install their package. When we want to share our code, we publish a package.
package.json: The Manifest
Section titled “package.json: The Manifest”Every project needs a receipt—a list of exactly what parts were ordered and how to use them. That’s the package.json file. It tracks:
- Metadata: Name, version, author (you!), license.
- Dependencies: The other packages your project needs to run.
- Scripts: Shortcuts to run your code (like
npm run dev).
Creating the Manifest
Section titled “Creating the Manifest”To start a new project and open your account with the warehouse, you generate this file. Navigate to your project folder in your terminal and run:
npm initThis will launch a questionnaire (Name? Version? Description?). It’s like filling out a shipping label.
(Solo Tip: If you’re in a rush and don’t care about the details yet, add the -y flag to say “Yes to All” and skip the interview.)
npm init -y[!NOTE] Professor’s Warning: Never manually edit the dependencies list in
package.jsonunless you know exactly what you are doing. Let the CLI manage that for you. Usenpm install(which we’ll cover soon) to add items to the list.
Adding “Scripts” (The Automation)
Section titled “Adding “Scripts” (The Automation)”The scripts section is where we define our own shortcuts. Instead of typing long, complex commands to start our app, we can just say “start”.
Open your new package.json and look for the "scripts" object. It usually looks like this by default:
"scripts": { "test": "echo \"Error: no test specified\" && exit 1"},Let’s add a standard startup script for a Node app (assuming your main file is app.js):
"scripts": { "test": "echo \"Error: no test specified\" && exit 1", "dev": "node app.js"},Now, to run your program, you simply type:
npm run dev(Because typing node app.js is so 2012, right? Okay, actually it’s fine, but scripts give us power when things get more complex.)
Extra Bits & Bytes
Section titled “Extra Bits & Bytes”Official NPM Docs
⏭ Hello Node
Section titled “⏭ Hello Node”We have the warehouse. We have the logistics team. Let’s ship our first box.